

dotal, n: a woman's marriage portion. anecdote, n: a short account of an interesting or humorous incident.
Wednesday, March 27, 2013
Silent
I apologize for the silence this week. Our family has been visited by grief as a sweet, precious member passed from this life. Our hearts are bleeding for the mourning parents above all, and for all of us as we stand by aching to offer comfort; thank you for the thoughts and prayers offered.
Tuesday, March 12, 2013
Deviled Meat Spread: My childhood, grown up and cooler
Thanks for reading this post, I'm so excited to visit with you!
After you've gleaned all the good information you need, visit our new blog platform at www.farmandhearth.com to read even more fascinating tidbits from the kitchen and the fields.
Dear angels,
Not gonna lie, I love deviled ham.
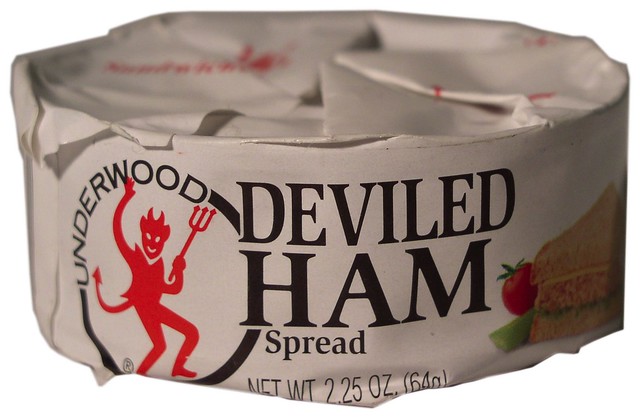
We enjoyed it in sandwiches when I was a child, and it wasn't until last year when we were living in San Diego that I remembered how good it was, sought out a can, and enjoyed it wickedly on a slice of homemade sourdough.
But what ingredients are in the canned ham? Well, sugar for one, and sodium nitrites for another. Both of these are ingredients I seek to avoid - so I was excited when I accidentally stumbled across a recipe in my super-useful old Vitamix book for deviled ham!


You can vary the seasonings as you desire - or use chicken or beef for a shredded meat sandwich! If I could only tell you how good this spread is! You wouldn't be here long enough to finish reading my blog post. Away to the kitchen!!

Choose your ingredients!

Scoop and dump seasonings and spreads into the bin of the Vitamix ...

Add cubed, cooked meat.

Chop coarsely!

Deviled Meat Spread
If you're vegetarian, replace the meat with cooked chickpeas!
1/4 cup mayonnaise (homemade is most delicious!)
1 tablespoon mustard (I used homemade ginger-garlic mustard)
1 teaspoon paprika - hot, spanish smoked, or sweet
1 teaspoon onion powder or 1 tablespoon minced onion
2 tablespoons pickle juice
1 tablespoon relish (optional)
Sliced pickles for topping (optional)
1-1/2 cups boiled, roasted or otherwise cooked leftover ham, chicken, beef or pork*, cut into 1" cubes
*Any meat, really. I mean this is basically tuna salad, with other meat.
Add ingredients to Vitamix in the order listed. Pulse at 10 several times, or for just one second on high, until coarsely shredded or chopped. Do Not overmix - if there are just one or two chunks left, let them be - you can easily overmix, and then you'll have a meat puree. Remember, on high the Vitamix blades hit the meat 1600 times per second, so it doesn't take long!!
Spread on sandwiches or roll in lettuce; serve with pickles for a spunky treat!

Mrs H
tweet us @_mrs_h for chewy nuggets
Pin us at Pinterest for pretty photos and intriguing articles
Follow us on Facebook for recipes, giveaways, and brilliant flashes of perspiration!
Friday, March 8, 2013
Homemade Deodorant That Works Better Than Dove Prescription Strength (made in one easy step)
Thanks for reading this post, I'm so excited to visit with you!
After you've gleaned all the good information you need, visit our new blog platform at www.farmandhearth.com to read even more fascinating tidbits from the kitchen and the fields.
Dear hard-working (and thus sweaty),
I consider myself an expert on store-bought deodorants.
As in, I've tried them all.
I HATE sweaty arm-pits - for some reason, it just irks the heck out of me when my arms feel sticky and soggy! Perhaps the rest of the world loves it, but I loathe it!
I thought I must just be super sweaty or something, because even the Dove Prescription Strength stuff wasn't doing the trick for me. Never thought about the fact that maybe store-bought deodorant, like store-bought cookies, milk and many (but not all) other conventional products, was just inferior to homemade, mystery-ingredient-less pit stopper.
Well, perhaps I considered it, but then remembered that homemade deodorant is hard to make. Not sure where I got that assumption, but pretty sure I believed it, because I mean, who makes deodorant, really?
I was inspired to make it by this post. This stuff was about as hard to make as a peanut butter sandwich. Warning: if you can't even make a peanut butter sandwich, you may not want to try this, in fact you may not want to try much of anything.
My ultra-fancy tools (hard to find but well worth it). Bowls, spoons, mixer or whisk, and an empty or almost-empty deodorant container and spatula.

The mysterious and esoteric ingredients, available from anywhere things are sold. Coconut oil, baking soda, cornstarch, and a scent if you like.

Literally it was just a few ingredients from my kitchen (three, to be exact, with one optional add-in), blended together. Done.
I warmed the coconut oil a little to make blending easier.

Then I easily blended in the baking soda and cornstarch, as well as a few drops of essential oil just for fun.

Smoosh, smoosh! I chilled it in the freezer for about two minutes because I am impatient, and smashed it all thickly together.

Look, empty deodorant container! I just took out the last scrap of deodorant. If you're worried about the homemade stuff melting through, you could leave a little store deodorant in the container as a plug.

I slobbed some of the homemade stuff into the deodorant container because I'm fancy like that, and put the rest in a jar for refills later.

Wiped it down and put on labels to be snazzy (a good time for chalk labels? I'd better order more).

Homemade Pit Stopper Better Than the Store Bought Stuff and Also Less Mysterious
I wasn't sure I trusted homemade deodorant yet, so when I mixed this batch up I made sure I had a little bit of the Real Stuff set aside. The next day I threw the Real Stuff away and now just use the Good Stuff! This may be difficult to make on a hot day, as coconut becomes liquid at warm temperatures.
You can buy empty deodorant containers online! Here is an affiliate link: 5 Deodorant Empty Containers - for lotion bar, heel balm etc. (2 oz.)
1/4 cup (generously scooped) coconut oil, warmed to partially liquid
1/4 cup baking soda
1/4 cup arrowroot or corn starch
Optional: essential oil or pure extract for aroma, unless you used virgin coconut oil in which case it will smell like coconut, yum!
Using a blender or a vigorous fork, whip together ingredients. Store in a jar and apply by hand, or cool until thick and pack into an empty deodorant container.
Note: If you are anxious try try it, you can make some now and then let it soften and pack it into an old deodorant container later! When I was packing it in to the deodorant container, I chilled it in the freezer for just a few minutes and then stirred it together to get it evenly thick. Also, if you keep your bathroom really hot, you should be warned that this will melt right out of your deodorant container unless you leave a little store deodorant in the container as a plug.

Using It: The Facts. When you initially swipe this on, your body heat will instantly melt the coconut oil and your arms will feel wet. When this happened, I was horrified! I hate spray-on or gel-like deodorants that feel wet. Hate them!! Even though I know you can leave your shirt off and let the deodorant dry, it never really does and I feel sticky and irritated all day.
However, in this instance I was pleasantly surprised to find that the deodorant dried instantly, by the time I could pull a shirt out of the drawer; and then miracle of miracles, I forgot I was wearing it all day! I even wore two t-shirts and a sweatshirt and then ran eight errands (with a baby!), which generally would leave me sticky and damp under the arms. When I got home that night I suddenly remembered I was testing homemade deodorant, and hurriedly took off my sweatshirt to see how soggy I was. What? No sticky? No sweaty? A miracle!! I raced off to throw away my store-bought deodorant immediately!!
Did I mention that even with premium coconut oil, this is still cheaper than buying deodorant at the store, even with store coupons... ?
You can even store spare deodorant in the freezer now - what a fun way to freak your friends out!
Not sticky,
Mrs H
tweet us @_mrs_h for chewy nuggets
Pin us at Pinterest for pretty photos and intriguing articles
Follow us on Facebook for recipes, giveaways, and brilliant flashes of perspiration!
Tuesday, March 5, 2013
Making Kefir from Starter - Five Easy Steps, No Gadgets Required!
Thanks for reading this post, I'm so excited to visit with you!
After you've gleaned all the good information you need, visit our new blog platform at www.farmandhearth.com to read even more fascinating tidbits from the kitchen and the fields.
Dear cultured,
Making kefir with a packet of starter is so easy-peasy, it's almost not even worth the time to post the instructions online! The directions are on the back of the box so you'll figure it out within seconds of opening the package, but I may never have made kefir myself if I hadn't heard how stupid easy it was.
Note: Different brands may have slightly varying directions, although the basic principles will remain the same. Be sure to read the directions on your box, first!
Of course, fresh kefir is ever so good for you with lots of nutritive probiotics ready to help work on your digestion, and the tart, tangy flavor is one of my favorite features! It makes a fast breakfast or a quick and filling snack, and it is even good (oh so good!) for little food-eating babies with developing immune and digestive systems. I prefer homemade kefir to store-bought for three reasons, one or all of which may resonate with you: 1. To avoid ultra-high heat pasteurized milk product. 2. To eliminate the added sugars and other curious ingredients. 3. To reduce the amount of plastic bottles and trash I throw out.
I like to enjoy a little culture every day - homemade yogurt, kefir, sauerkraut or some seasonal Vivaldi.
You can buy packets or boxes of powdered cultures online - here at Cultures for Health (they have many other fabulous resources, as well) or at Amazon
By the by, what are kefir grains? The other way to make kefir is using kefir grains, which you can also buy online or get from a friend who has too many. I forgot to tend to mine (ahem) so I had to throw them out just this morning, and now must rely on the goodness of friends to give me some new ones!
Kefir starter is just another way to do the same thing and is a nice fall-back if you have no grains or are new to culturing foods.

 |
| This little guy watched the whole thing and he thought it was hilarious |
Heat the milk. You can't use ultra-pasteurized milk for culturing, so check your store for low-heat pasteurized milk (usually it comes in glass bottles and will have a cream top) or raw milk.

Check how many packets of starter you will need (there were six packets in my box, and it takes one packet per quart of milk).


Dissolve the starter into a little bit of the milk.

Pour it all back into the pot, mix well and let it sit for 24 hours. That's it!

Kefir Made With Starter - Five Easy (Super, super easy) Steps
Easy-peasy-pudding-n-pie - this is so simple I thought I would die! For the pan, I use a simple, non-reactive metal pan - a heavy crock would hold too much heat and it would take eons for the milk to cool down, and a Teflon-lined pan would be bad for our health.
Raw or low-heat pasteurized (usually in a glass bottle) milk
Kefir starter
Check your box of starter to see how much milk they use per packet of powdered starter. The yogourmet
1. Heat the milk to 180F or simply bring to an almost-boil.
2. Turn off the heat and let it cool, at room temperature, down to 73 - 77F.
3. Remove a little bit of the milk into a bowl and whisk the culture into it, dissolving it thoroughly. Pour it back into the pot of cooled milk and stir it in well.
4. Cover the pot or transfer into a clean jar, cover, and set out of the way so the inoculated milk can stand at room temperature for 24 hours or until curd forms - until it thickens. Read more tips on kefir containers.
5. Refrigerate for 8 hours to halt the process. Stir well and enjoy!
Kefir is tart, tangy and tastes like sour yogurt. If it's too tart for you or just for a change of pace, blend in some honey, maple syrup or fruit!
I added a half-pint of blueberries to a little over a quart of kefir, as well as a few drops of raw honey.


Quaint and cultured,
Mrs H
tweet us @_mrs_h for chewy nuggets
Pin us at Pinterest for pretty photos and intriguing articles
Follow us on Facebook for recipes, giveaways, and brilliant flashes of perspiration!
Saturday, March 2, 2013
Winter Salsa - Local, Organic, Cheap
Thanks for reading this post, I'm so excited to visit with you!
After you've gleaned all the good information you need, visit our new blog platform at www.farmandhearth.com to read even more fascinating tidbits from the kitchen and the fields.
Dear amigos,
Mr H loves salsa. I make it about every week, sometimes more often, when he is home. How to keep it affordable, and made from local and organic ingredients even in the dead of winter? We don't have cold frames for tomatoes and jalapenos won't grow here in winter, so we rely on canned and frozen ingredients from the summer prior!

Winter Salsa
If you like your salsa blended anyway, use a pure home-canned tomato sauce instead of chopped tomatoes; I sometimes use one quart sauce, one quart diced.
2 quarts diced tomatoes
2 cups chopped, frozen onions
2 cups chopped, frozen peppers
2 cups raw corn, frozen (optional)
1 pint cooked or home-canned black beans (optional)
1/4 - 1/2 cup chopped frozen cilantro or 2 tbsp dried cilantro
1 canned or frozen habanero or jalapeno (more or less to taste)
Sea salt, to taste (several teaspoons, generally)
Freshly ground black pepper
Dried, ground garlic, garlic flakes, or coarse garlic salt
Ground cumin, to taste (2 tablespoons or more, generally)
Thaw frozen items; drain in a mesh strainer. Drain tomatoes in mesh strainer, letting sit for several hours or pressing with a spoon to remove some of the extruded water. Drain beans. Chop pepper or throw in Vitamix with some of the tomatoes or sauce, and about half the onions and peppers. Stir all ingredients together, season to taste, and serve fresh.

Dipping in,
Mrs H
tweet us @_mrs_h for chewy nuggets
Pin us at Pinterest for pretty photos and intriguing articles
Follow us on Facebook for recipes, giveaways, and brilliant flashes of perspiration!
Friday, March 1, 2013
Pumpkin Puree: How to Make It, How to Use It
Thanks for reading this post, I'm so excited to visit with you!
After you've gleaned all the good information you need, visit our new blog platform at www.farmandhearth.com to read even more fascinating tidbits from the kitchen and the fields.
Dear pompkin-lovers,
I really do love a good ol' pumpkin. Last fall, I bought a trunk-load of pie pumpkins, and I've been gradually incorporating them into the kitchen. Pumpkins can last for months in a cool, dry place (under our dining table), and I'm enjoying having fresh puree for now, but shortly I'll be roasting, pureeing and freezing them all in one big swoop to clear the space out.

Roasting Pumpkins
Use "Sugar Pumpkins" or "Pie Pumpkins" or "Sugar Pie Pumpkins" for this - they are small, usually about 2 - 4 lbs. Do not attempt to use the large jack-o-lantern pumpkins for eating - they will be watery, stringy, tough, and nasty as they are bred for size, not food. They are definitely not edible!
Preheat oven to 350. Wash pumpkin.
Halve pumpkins. Remove seeds and set aside; scrape out the stringy pulp. Cut pumpkin into wedges or halves and lay, flesh-side down, in a pan.
Roast for 45 minutes or until flesh is tender and soft when pricked with a fork.
Using a knife, your hands, or a spoon, scrape the flesh from the skin; discard skin (makes great compost!).
Puree the pumpkin flesh in a blender until fine and smooth. 1 pound of uncut pumpkin makes approximately 1 cup of blended puree. Freeze in tubs and transfer to vacuum-seal bags, or freeze in ziplock bags like Miz Carmen.
Optional: If you want a less wet puree, more appropriate for blending into cheeses or butters and possibly more cooperative in some baking applications, or spooning into yogurt, then line a mesh strainer with cheesecloth and set over a bowl. Pour in the puree and let it strain in a bowl overnight. Discard the liquid and use the remaining puree as desired.


Pumpkin Seeds
You can roast seeds, but I prefer dehydrating them. You can do this if you have more seeds than you want to roast all at once, or you can do it if you prefer to keep them as a "living food" and add to trail mixes or granola bars.
Clean the fibrous threads of pumpkin off the seeds; rinse if desired. Pat dry and spread evenly on a dehydrator tray; dry at 135 for several hours or until they are crispy and dry. Store in an airtight container; freeze if they will be left for several months or more.


Using Pumpkin Puree
Pie Town USA: Perhaps the most obvious choice in our minds is a traditional American Pumpkin Pie! Mix up your own pumpkin pie spice and blend it with the puree before freezing, if you are planning to make a lot of pies in the future. If you're tired of Libby's recipe, try this allergen-free real-food Pumpkin Pie, based on the recipe from Nourishing Traditions. Note: Pie Town is a real place, and Mr H and I were there. "There were three buildings," he later said, "and all of them said pie for sale!" They even have a Pie-O-Neer Cafe. Truth is stranger than fiction!
Drink it Up: Stir puree into your hot drinks, or throw it in your smoothies. (I'm in the testing phase for a pumpkin smoothie! Cue pumpkins, bananas, creamy whole milk, pumpkin spice, honey, an egg white, vanilla ... is this breakfast, or is it dessert?!)
Layered: stack homemade yogurt, homemade granola, dried cranberries, and pumpkin puree! Dig in for a hearty breakfast (or freeze for a dreamy snack).
Baked Delight: Add to brownies, pancakes, waffles or cakes with pumpkin puree; add it to banana bread, muffins, or other delights either in addition to or in place of butter or oil.
Stir it: stir pureed pumpkin in to wheat farina or Cream of Wheat, or oatmeal or groats.
A Dazzling List: Thousands of other bloggers have weighed in on this topic over time, and this blogger has collected 50 of the best ways to use puree (I can't vouch for all of them - many of them are not "real food" recipes, but they may spark your own ideas).
Blended: throw pumpkin puree in the Vitamix with cream cheese and a little cinnamon or honey. Use it as a spread for toast and bagels!
Tired of Puree? If you don't want to puree your pumpkin, here's another fun recipe idea: Cut off the top, remove the seeds, and roast your dinner inside!
Soup on Tap: add the puree to a pot of soup to thicken and increase flavor.
Harvest Leather: Sweeten with sugar or maple syrup and pumpkin spice, and cook down until the volume reduces by about one third; spread on a dehydrator lined with parchment paper (NOT wax paper) or leather trays, and dehydrate for several hours or until the center is no longer tacky. Cool before peeling from trays.
Canning Pumpkin? Are you low on freezer space? It is possible to can pumpkin, but it's too dense to be pureed and canned: it has to be processed in cubes. Follow the canning instructions here; when you want pumpkin puree, just strain out the water and puree the cubes. The whole cubes (and their liquid) also make a great addition to soup!
Pumpkin Ice Cream: why say more?
Pompous as can be,
Mrs H
tweet us @_mrs_h for chewy nuggets
Pin us at Pinterest for pretty photos and intriguing articles
Follow us on Facebook for recipes, giveaways, and brilliant flashes of perspiration!
Subscribe to:
Posts (Atom)