Showing posts with label cooking. Show all posts

Monday, July 21, 2014

Visit Us at the New Blogstead - We're moving!

Dear Readers,

If you've noticed the blog was a little quiet, you weren't the only one!  We're moving to a new blog address called Farm and Hearth


Head over to www.farmandhearth.com and leave a comment on our blogwarming post - you will be the start of something big! And follow my Instagram feed for crazy-delicious food!

But what do I mean, big?

http://samiroyphotography.com/
photos by Sami Roy Photography

During my husband's deployment through 13-'14, I spent less time on the computer and more time filling my hours with our baby, volunteering on New Earth Farm in Eastern Virginia. An organic, biodiverse, sustainable, water-conserving farm led by Farmer John and Farmer Kevin and their team, this is a farm that is shaking things up. We troweled in the dirt, washed eggs, worked the farmer's market stand, dug potatoes, chased sheep and watched lambing, picked kale with red-numb fingers in December and harvested tomatoes in sweat-sticky August. I started working at the farm as a fermentation and food preservation expert, and following the vision of our farm manager Kevin, we developed an entirely new facet of the farm called the Food Lab.  Here, in an airy, high-ceilinged building designed by interned architects and built entirely by donations, we experiment with food, create, invent, fail and laugh, and I teach classes in our new Food Lab - kombucha, advanced kombucha, sauerkraut, charcuterie, pasta, canning, lacto-fermentation ... and I take the classes mobile, too, teaching at Williams-Sonoma, Whole Foods, Norfolk Botanical Gardens, local garden clubs, private classes, area shops and markets.

http://samiroyphotography.com/

http://samiroyphotography.com/

http://samiroyphotography.com/

I finished my 200-hour yoga teacher training, took a prenatal yoga teacher training to add to my Simkin Center doula training and then immersed myself in a few other teacher trainings both in Virginia and in Seattle, meeting Manju Jois, Troy Lucero, Suzanne Hiite and other yoga legends (I am heading off to the Baron Baptiste Level One training in August 2014! Very excited). I'm still writing for the San Francisco Book Review and their Alphabet Soup and Critical Eye blogs, and I began writing for a magazine after they came to the farm for a photo shoot and a four-page spread on the Food Lab.  Journalists and magazine writers from around the world started calling for media visits every week; schools drove buses of children out for tours. All - and I mean all - the top chefs in our area, keen on the best tasting, freshest produce and the unusual weeds, bugs and herbs we could provide, started descending on the farm and hammering us with questions, the most passionate of them digging in the dirt themselves and foraging with us for wild plants. They started inviting me in to their kitchens for private, pre-hours sessions with them, working to create the most delicious, unusual, ancient foods together. Farm Table events, where brilliant chefs designed a menu based on whatever we had to harvest that day and fourteen paying participants attend to cook and eat with the chef, started selling out back to back.

http://samiroyphotography.com/

http://samiroyphotography.com/

http://samiroyphotography.com/

Whole Foods, Williams-Sonoma, local goat farms, butchers and pork farms, Bonfire Magazine, and other wonderful area providers and organic farms joined the charge as class sponsors, providing ingredients, tools, publicity, whole-hearted support. A photographer volunteered her time to come shoot events, edit the photos and get them back to us - she shot all the pictures in this post!  An appliance store donated a dishwasher. Area chefs donated used tools. Farm visitors donated cash, kitchen gear, time to paint and sweep and mop, just plain shook our hands and encouraged us to keep doing what we were doing.  Contractors gave tools and materials for our building, time, skill. With a massive group effort, the building was put together, the classes fell into place, and the people started coming.

http://samiroyphotography.com/

http://samiroyphotography.com/

http://samiroyphotography.com/

With the scope of the blog ever evolving and my audience constantly growing, the name of the blog has itself evolved and I've had to move to a different platform - quite a daunting prospect in the blog world, but I am ready to take it on with your faithful reading support! All the good information on this blog will stay here, safely housed and accessible for us to search, read and bookmark, and the best posts will also be imported over to the new blog platform to find a fresh, new look.

Watch in shock and awe as farm-tested recipes straight from the field roll out, photos and news clips and tutorial videos, hilarious and piquing interviews, even horror stories roll out on the new blog! You'll even start seeing things for sale. Events will be posted on the blog so you can find when a class is coming to a city near you, and is a cookbook in the works?  I can't say anything officially. But maybe we've finally heard your demands? Class tours will start to open up nationwide as I do a West Coast series in August in Seattle, Washington! And you can always visit us on the farm for a tour, a class, or just lunch with the farmhands - every day, at about noon. We'd love to have you.

Mrs H
www.farmandhearth.com
instagram.com/foodlab_newearthfarm

http://samiroyphotography.com/

http://samiroyphotography.com/

http://samiroyphotography.com/

http://samiroyphotography.com/

Wednesday, May 22, 2013

Farmstead Meatsmith: Butchery Precepts

The Wednesday Review:
Reviewing books, products and more

This is a post about meat.  
You will see one dead chicken, and if you play the videos, 
you will see images from butchery.  

Dear carnivores, 

If you like fresh, local meat, you may be interested in learning how to butcher one day.  Even if you never butcher for yourself, it is useful to understand the process, the various cuts of meat, and how to use the more miscellaneous scraps you may acquire (backfat, pig's feet, et cetera).

I believe that when an animal is respectfully sacrificed for human consumption, every possible shred of the creature should be used, and nothing wasted.  To waste anything is to disrespect the sacredness of the creature we are consuming, in my opinion.


Monday, May 20, 2013

Directions for Easy Homemade Pizza

Beloved pizzerias,

Homemade pizza is so simple and easy to make - in fact, as I write this post I think I will need to make pizza for dinner tomorrow night.  It's so irresistible when it's fresh and homemade!

Step 1: Make pizza crust.  Whole Wheat Yeasted, Whole Wheat Sourdough, or a version of your own: they are all easy.  Before rolling it out onto a hot pizza stone, scatter the stone with cornmeal.  If you are using a metal pizza pan, spray it with olive oil first.

Step 2: Mix up a marinara sauce.  Using a pint of homemade tomato sauce, whisk in a few tablespoons of Italian seasoning and a teaspoon of salt, or stir in any variety of fresh, frozen or dried herbs of your choice.  Basil, oregano and rosemary are popular options.  Spread the marinara on your pizza crust.

Step 3: Sprinkle the pizza with the toppings of your choice.  Just about anything can go on pizza!  Cooked meats, fresh and cooked vegetables, jarred olives and artichokes, and a hundred other things are all popular toppings.  If you like, top the pizza with cheese.

Step 4: Bake the pizza at 375 or 400 for 15 to 20 minutes, or until the crust is cooked through and the cheese is melted.


Buon appetito,


Mrs H
tweet us @_mrs_h for chewy nuggets
Pin us at Pinterest for pretty photos and intriguing articles
Follow us on Facebook for recipes, giveaways, and brilliant flashes of perspiration!

Thursday, May 16, 2013

Ricotta Salata and Making a Cheese Press

Thanks for reading this post, I'm so excited to visit with you!  
After you've gleaned all the good information you need, visit our new blog platform at www.farmandhearth.com to read even more fascinating tidbits from the kitchen and the fields. 

Dear cheeseheads,

It's summer time!


Time for long bike rides, hot afternoons on the beach, and fly swatters.

Visiting the farm on a warm afternoon, we recently enjoyed a light snack of homemade crackers, fresh ricotta salata, and lemonade.

Ricotta Salata
To make fresh ricotta salata, you will need a cheese press.  If you don't have one, a very handy one can be fashioned from tools you may already have in your kitchen.

To learn how I make ricotta cheese, click here (external link).  

This cheese press works excellently with ricotta cheese and farmer's cheese, also called farmhouse cheese or cottage cheese. 


Ricotta Salata
You can eat this plain, or slice it onto crackers or sandwiches or serve with cut pears.  It makes a beautiful appetizer!  If you use much more than two cups of cheese in this small press, your block will be a little loose in the middle and not quite as uniform.  It still works quite well - I often pour in much more farmer's cheese than I should and get large, misshapen blocks because sometimes I don't care - but two cups is the perfect amount for a compact piece of cheese.  

1 pound (about 2 cups) fresh ricotta
4 teaspoons salt

Remove the top and bottom of a 28-ounce metal can.  Carefully wash all three components - the edges will be sharp.  You can file them down if you like; I just treat them cautiously, like knives.  

Set the can on an inverted bowl or elevated plate, set inside a pan or bowl to catch whey which will spill out.  Place the metal bottom inside the can.  If your cheese is very soft and liquidy, you can lay a piece of cheesecloth or muslin in the can; this is optional.  

Pour or scoop the cheese into the can.  Set the second lid on top, and weight it down with a heavy jar - a quart jar of water or peaches will do the trick.  Whey will begin to ooze out the bottom of the can - if you press down heavily on the weight, you may press cheese out, so be careful.  Set on the counter or in the refrigerator for about four hours, or refrigerate overnight.  

Remove the cheese from the can gently.  If you lined the can with cheesecloth or muslin, peel it back from the cheese carefully.  If you are pressing farmer's cheese, it will be finished now.  For ricotta salata, continue on: 

Using two teaspoons of salt, rub the outside of the cheese and wrap it in a thin cloth.  Refrigerate overnight or for two days.  Remove and again rub with two more teaspoons of salt, curing it for another day or two.  Repeat this step again if you like.  The finished cheese will be firm and well-salted on the outside - don't worry, it won't taste ridiculously salty.  The curing process seems to absorb the salt into the body of the cheese.  

Putting the loose ricotta in
Rosemary croccantini can be made with various toppings.  The crackers on the left are topped with traditional sea salt and rosemary.  The center cracker has a multi-seed topping.  The final cracker on the right is topped with crushed black pepper.

You can also get creative with the shape and size of the crackers!  I made these small, as they were to hold cheese samples.


Eating my curds and whey,

Mrs H
tweet us @_mrs_h for chewy nuggets
Pin us at Pinterest for pretty photos and intriguing articles
Follow us on Facebook for recipes, giveaways, and brilliant flashes of perspiration!

Tuesday, March 12, 2013

Deviled Meat Spread: My childhood, grown up and cooler

Thanks for reading this post, I'm so excited to visit with you!  
After you've gleaned all the good information you need, visit our new blog platform at www.farmandhearth.com to read even more fascinating tidbits from the kitchen and the fields. 

Dear angels,

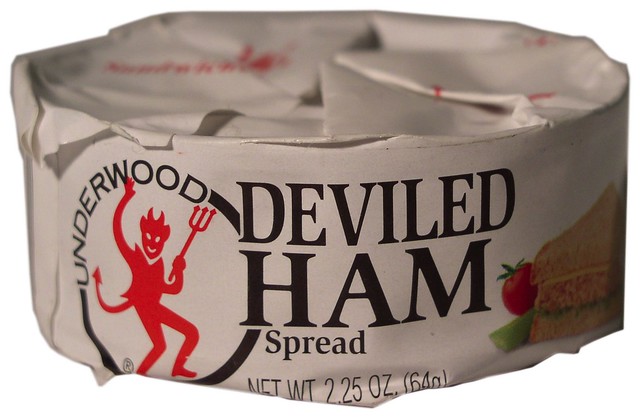
Not gonna lie, I love deviled ham.


We enjoyed it in sandwiches when I was a child, and it wasn't until last year when we were living in San Diego that I remembered how good it was, sought out a can, and enjoyed it wickedly on a slice of homemade sourdough.

But what ingredients are in the canned ham?  Well, sugar for one, and sodium nitrites for another.  Both of these are ingredients I seek to avoid - so I was excited when I accidentally stumbled across a recipe in my super-useful old Vitamix book for deviled ham!


You can vary the seasonings as you desire - or use chicken or beef for a shredded meat sandwich!  If I could only tell you how good this spread is!  You wouldn't be here long enough to finish reading my blog post.  Away to the kitchen!!


Choose your ingredients!


Scoop and dump seasonings and spreads into the bin of the Vitamix ...


Add cubed, cooked meat.


Chop coarsely!


Deviled Meat Spread
If you're vegetarian, replace the meat with cooked chickpeas! 

1/4 cup mayonnaise (homemade is most delicious!)
1 tablespoon mustard (I used homemade ginger-garlic mustard)
1 teaspoon paprika - hot, spanish smoked, or sweet
1 teaspoon onion powder or 1 tablespoon minced onion
2 tablespoons pickle juice
1 tablespoon relish (optional)
Sliced pickles for topping (optional)
1-1/2 cups boiled, roasted or otherwise cooked leftover ham, chicken, beef or pork*, cut into 1" cubes

*Any meat, really.  I mean this is basically tuna salad, with other meat.

Add ingredients to Vitamix in the order listed.  Pulse at 10 several times, or for just one second on high, until coarsely shredded or chopped.  Do Not overmix - if there are just one or two chunks left, let them be - you can easily overmix, and then you'll have a meat puree.  Remember, on high the Vitamix blades hit the meat 1600 times per second, so it doesn't take long!! 

Spread on sandwiches or roll in lettuce; serve with pickles for a spunky treat! 


Floating away on a cloud of deviled ham,


Mrs H
tweet us @_mrs_h for chewy nuggets
Pin us at Pinterest for pretty photos and intriguing articles
Follow us on Facebook for recipes, giveaways, and brilliant flashes of perspiration!

Friday, March 8, 2013

Homemade Deodorant That Works Better Than Dove Prescription Strength (made in one easy step)

Thanks for reading this post, I'm so excited to visit with you!  
After you've gleaned all the good information you need, visit our new blog platform at www.farmandhearth.com to read even more fascinating tidbits from the kitchen and the fields. 

Dear hard-working (and thus sweaty),

I consider myself an expert on store-bought deodorants.

As in, I've tried them all.

I HATE sweaty arm-pits - for some reason, it just irks the heck out of me when my arms feel sticky and soggy!  Perhaps the rest of the world loves it, but I loathe it!

I thought I must just be super sweaty or something, because even the Dove Prescription Strength stuff wasn't doing the trick for me.  Never thought about the fact that maybe store-bought deodorant, like store-bought cookies, milk and many (but not all) other conventional products, was just inferior to homemade, mystery-ingredient-less pit stopper.

Well, perhaps I considered it, but then remembered that homemade deodorant is hard to make.  Not sure where I got that assumption, but pretty sure I believed it, because I mean, who makes deodorant, really?

I was inspired to make it by this post.  This stuff was about as hard to make as a peanut butter sandwich.  Warning: if you can't even make a peanut butter sandwich, you may not want to try this, in fact you may not want to try much of anything.  

My ultra-fancy tools (hard to find but well worth it).  Bowls, spoons, mixer or whisk, and an empty or almost-empty deodorant container and spatula.


The mysterious and esoteric ingredients, available from anywhere things are sold.  Coconut oil, baking soda, cornstarch, and a scent if you like.


Literally it was just a few ingredients from my kitchen (three, to be exact, with one optional add-in), blended together.  Done.

I warmed the coconut oil a little to make blending easier.

  
Then I easily blended in the baking soda and cornstarch, as well as a few drops of essential oil just for fun.  


Smoosh, smoosh!  I chilled it in the freezer for about two minutes because I am impatient, and smashed it all thickly together.


Look, empty deodorant container!  I just took out the last scrap of deodorant.  If you're worried about the homemade stuff melting through, you could leave a little store deodorant in the container as a plug.


I slobbed some of the homemade stuff into the deodorant container because I'm fancy like that, and put the rest in a jar for refills later. 


Wiped it down and put on labels to be snazzy (a good time for chalk labels?  I'd better order more).


Homemade Pit Stopper Better Than the Store Bought Stuff and Also Less Mysterious
I wasn't sure I trusted homemade deodorant yet, so when I mixed this batch up I made sure I had a little bit of the Real Stuff set aside.  The next day I threw the Real Stuff away and now just use the Good Stuff! This may be difficult to make on a hot day, as coconut becomes liquid at warm temperatures. 

You can buy empty deodorant containers online!  Here is an affiliate link: 5 Deodorant Empty Containers - for lotion bar, heel balm etc. (2 oz.)


1/4 cup (generously scooped) coconut oil, warmed to partially liquid
1/4 cup baking soda
1/4 cup arrowroot or corn starch
Optional: essential oil or pure extract for aroma, unless you used virgin coconut oil in which case it will smell like coconut, yum!

Using a blender or a vigorous fork, whip together ingredients.  Store in a jar and apply by hand, or cool until thick and pack into an empty deodorant container.

Note: If you are anxious try try it, you can make some now and then let it soften and pack it into an old deodorant container later!  When I was packing it in to the deodorant container, I chilled it in the freezer for just a few minutes and then stirred it together to get it evenly thick.  Also, if you keep your bathroom really hot, you should be warned that this will melt right out of your deodorant container unless you leave a little store deodorant in the container as a plug.


Using It: The Facts. When you initially swipe this on, your body heat will instantly melt the coconut oil and your arms will feel wet.  When this happened, I was horrified!  I hate spray-on or gel-like deodorants that feel wet.  Hate them!!  Even though I know you can leave your shirt off and let the deodorant dry, it never really does and I feel sticky and irritated all day.

However, in this instance I was pleasantly surprised to find that the deodorant dried instantly, by the time I could pull a shirt out of the drawer; and then miracle of miracles, I forgot I was wearing it all day!  I even wore two t-shirts and a sweatshirt and then ran eight errands (with a baby!), which generally would leave me sticky and damp under the arms.  When I got home that night I suddenly remembered I was testing homemade deodorant, and hurriedly took off my sweatshirt to see how soggy I was.  What?  No sticky?  No sweaty?  A miracle!!  I raced off to throw away my store-bought deodorant immediately!!

Did I mention that even with premium coconut oil, this is still cheaper than buying deodorant at the store, even with store coupons... ?

You can even store spare deodorant in the freezer now - what a fun way to freak your friends out!

Not sticky,

Mrs H
tweet us @_mrs_h for chewy nuggets
Pin us at Pinterest for pretty photos and intriguing articles
Follow us on Facebook for recipes, giveaways, and brilliant flashes of perspiration!

Tuesday, March 5, 2013

Making Kefir from Starter - Five Easy Steps, No Gadgets Required!

Thanks for reading this post, I'm so excited to visit with you!  
After you've gleaned all the good information you need, visit our new blog platform at www.farmandhearth.com to read even more fascinating tidbits from the kitchen and the fields. 

Dear cultured,

Making kefir with a packet of starter is so easy-peasy, it's almost not even worth the time to post the instructions online!  The directions are on the back of the box so you'll figure it out within seconds of opening the package, but I may never have made kefir myself if I hadn't heard how stupid easy it was.

Note: Different brands may have slightly varying directions, although the basic principles will remain the same.  Be sure to read the directions on your box, first!  

Of course, fresh kefir is ever so good for you with lots of nutritive probiotics ready to help work on your digestion, and the tart, tangy flavor is one of my favorite features!  It makes a fast breakfast or a quick and filling snack, and it is even good (oh so good!) for little food-eating babies with developing immune and digestive systems.  I prefer homemade kefir to store-bought for three reasons, one or all of which may resonate with you: 1. To avoid ultra-high heat pasteurized milk product.  2. To eliminate the added sugars and other curious ingredients.  3. To reduce the amount of plastic bottles and trash I throw out.

I like to enjoy a little culture every day - homemade yogurt, kefir, sauerkraut or some seasonal Vivaldi.


You can buy packets or boxes of powdered cultures online - here at Cultures for Health (they have many other fabulous resources, as well) or at Amazon (affiliate link - this is the starter culture I used.  The same brand offers yogurt culture as well, also available from Amazon).  You can usually buy it at your local health food store or Whole Foods (I've never seen any in Trader Joe's, though).

By the by, what are kefir grains?  The other way to make kefir is using kefir grains, which you can also buy online or get from a friend who has too many.  I forgot to tend to mine (ahem) so I had to throw them out just this morning, and now must rely on the goodness of friends to give me some new ones!

Kefir starter is just another way to do the same thing and is a nice fall-back if you have no grains or are new to culturing foods.


This little guy watched the whole thing and he thought it was hilarious
You don't need any fancy gadgets, just a kitchen thermometer for accuracy, a pot for heating and a whisk, spoon or blender for bringing it all together.  And a hearty appetite for deliciousness!

Heat the milk.  You can't use ultra-pasteurized milk for culturing, so check your store for low-heat pasteurized milk (usually it comes in glass bottles and will have a cream top) or raw milk.


Check how many packets of starter you will need (there were six packets in my box, and it takes one packet per quart of milk).


 Let the milk cool down.


Dissolve the starter into a little bit of the milk.


Pour it all back into the pot, mix well and let it sit for 24 hours.  That's it!


Kefir Made With Starter - Five Easy (Super, super easy) Steps
Easy-peasy-pudding-n-pie - this is so simple I thought I would die!  For the pan, I use a simple, non-reactive metal pan - a heavy crock would hold too much heat and it would take eons for the milk to cool down, and a Teflon-lined pan would be bad for our health.  

Raw or low-heat pasteurized (usually in a glass bottle) milk
Kefir starter

Check your box of starter to see how much milk they use per packet of powdered starter.  The yogourmet starter I used takes one quart of milk per packet of starter.

1. Heat the milk to 180F or simply bring to an almost-boil.

2. Turn off the heat and let it cool, at room temperature, down to 73 - 77F.

3. Remove a little bit of the milk into a bowl and whisk the culture into it, dissolving it thoroughly.  Pour it back into the pot of cooled milk and stir it in well.

4. Cover the pot or transfer into a clean jar, cover, and set out of the way so the inoculated milk can stand at room temperature for 24 hours or until curd forms - until it thickens.  Read more tips on kefir containers.

5. Refrigerate for 8 hours to halt the process.  Stir well and enjoy!

Kefir is tart, tangy and tastes like sour yogurt.  If it's too tart for you or just for a change of pace, blend in some honey, maple syrup or fruit!

I added a half-pint of blueberries to a little over a quart of kefir, as well as a few drops of raw honey.


Quaint and cultured,


Mrs H
tweet us @_mrs_h for chewy nuggets
Pin us at Pinterest for pretty photos and intriguing articles
Follow us on Facebook for recipes, giveaways, and brilliant flashes of perspiration!

ShareThis

LinkWithin

Related Posts with Thumbnails