Saturday, May 18, 2013

My Reading Basket (Edition One!)

Thanks for reading this post, I'm so excited to visit with you!  
After you've gleaned all the good information you need, visit our new blog platform at www.farmandhearth.com to read even more fascinating tidbits from the kitchen and the fields. 

Dear avid readers and part-time literates,


Polonius: What do you read, my lord?
Hamlet: Words, words, words.


I love seeing what other people put in their grocery carts.  I love seeing what they plant in their garden.  And I love seeing what they are reading!

Don't worry, I won't recount for you what is in our pantry right now (you might not all be as weird as I am!). Rather, I want to share a few of the books in my reading basket right now, and ask you what you are are currently reading!

In this modern era, we have books from the library, books we bought at the store or received by mail for review, Nook books, and audio books - so I, of course, take advantage of all these avenues for word input and have something going in each category.  I'm including Amazon affiliate links for each book in case you want to click through and read reviews or buy the book for your Kindle or whatever.

Listening in my car


Miss Peregrine's Home for Peculiar Children by Ransom Riggs  |  I'm only a few chapters in.  It's very entertaining!  I'll warn gentle readers that, so far, I have encountered a few instances of language.  It's also a little scary, so if you have young ones I would suggest reserving this for your own personal reading or drive time!  So far, it is a wonderfully written, vivid mystery!

Listening on the Nook

The Curse of the Pharaohs by Elizabeth Peters  |  The second book in the acclaimed 19-book series based on the doughty character Amelia Peabody and her archaeological enterprises in Egypt during the Victorian period, I have read the first six books and own the entire series.  I haven't read them in a while, though, so before I picked back up on the series I wanted to listen to the books and refresh my memory.  The book plays during the day (in fact, it's playing right now!), and makes great entertainment while I'm washing dishes. You can download the Overdrive Media App to your smart phone, laptop, computer, or reading device and use it to check out eBooks and eAudiobooks from your local library.  This is a tip my mom shared with me, and it has filled my life with free and wonderful literature!   

Reading on the Nook

Wheat Belly by William Davis, MD  |  This controversial book is surprising, shocking, and not surprising at all!  I am two-thirds finished with the book and enjoying it immensely; you will probably see a full review on it later in the blog, as it has already impacted the way we eat (and yes, I am aware of the arguments against the book - I love controversial books and blogs!).  

Reading for the blog

The Home Creamery by Kathy Farrell-Kingsley  |  Publishers have generously sent me rafts of books to review for the blog - and I can't wait to share the entire list with you (most of them are accompanied by giveaways!  Hurray!).  I am not sure yet if this book is my favorite on home creamery work yet, though.  I've made about half the recipes in the book and had to supplement them with information from other books.  I know Storey has a second book on home creameries, so I may check that one out before I settle the review.  

Reading for the Sacramento Book Review
Once Upon a Flock: Life With My Soulful Chickens by Lauren Scheuer  |  I just finished reviewing this book, and I can't wait for the review to be published at www.citybookreview.com.  I thought it might be a mildly entertaining, and maybe cute book about chickens, but it was so much more than that!  It was, in fact, a moving story and an anthropological and zoological study that made me realize that chickens are not just egg-laying creatures, but truly soulful beings with little minds of their own!  It was emotional and it was touching, and it left me yearning to start my own home flock!! 

Reading for fun

The Other Side of the Dale by Gervase Phinn  |  Compared often to James Herriot's All Creatures books, this story chronicles the adventures of a school inspector in North Yorkshire in days of yore.  The stories are humorous and colorful, the writing is clean and fresh, and - I'm about a third through this book - so far, everything is clean and wonderfully family-friendly.  

Reading from the library
The Kitchen House by Kathleen Grissom  |  I have only just cracked the cover on this, but I can't wait to read it.  It's set in old-time Virginia and the main character is a white slave.  

Reading for education
Educating the WholeHearted Child by Clay Clarkson and Sally Clarkson  |  A gift from my parents, this book is especially useful if you plan to school your children at home.  I have only just begun to wade into it, but the Clarksons are acknowledged pioneers and innovators in the field of home education!  A worthy read!  

A Charlotte Mason Companion by Karen Andreola  |  Another staple for the homeschool parent, this book is filled with revolutionary (to a country steeped in pen-and-desk tradition) concepts for education.  

Reading in the kitchen

Prairie Home Cooking by Judith Fertig  |  I cycle through my cookbooks and periodically re-read favorites to plumb them for new concepts and recipes I may have overlooked on the last circuit.  I am currently re-reading PHC, one of my favorite books, and one of the first in my collection.  It was a gift from my grandma and I treasure it!  

There are more books, many books in the basket and on my kitchen counter, but of course I am always seeking further recommendations!  Every once in a while you just hit that perfect, golden book that lives on and on as a classic family favorite!  

What are you reading right now in your various categories?  Do you have a reading basket, or a shelf of books waiting to be consumed, or an Amazon wishlist?  Do you read for pleasure, or just for school or work?  Are you reading any of the books I mentioned here, and do you have further suggestions for me? 

Reading words, 

Mrs H
tweet us @_mrs_h for chewy nuggets
Pin us at Pinterest for pretty photos and intriguing articles
Follow us on Facebook for recipes, giveaways, and brilliant flashes of perspiration!

Friday, May 17, 2013

Myths About Large Families - Your Questions, Answered

Dear gentle reader,

Have you ever met somebody from a big family?  Are you from a big family yourself?


There are lots of myths and legends regarding big families, or even just kids in general.

"Kids are too expensive.  We can't afford to have another."

"Have you seen these two bicker?  We couldn't handle having a big family fighting like that all the time!"

"The kids couldn't all have their own room.  Growing up, that was important to me; I wouldn't want to deprive my kids of that advantage."

This, and many other myths, are heard day and night by big families.  I myself am the second of eight - and you know how much that experience meant to me!

My parents have heard it all - every snide remark, every jab, every rude comment.  They take it all in stride as you know, letting the thoughtless and uneducated remarks of the intelligence-impoverished roll of their backs.  But the questions, while sometimes impolite and intrusive, are often simple curiosity or uninstructed ignorance, and in truth they do deserve to be answered.  Who better to answer these questions than my parents, practiced veterans of society's attention and commentary?

And answer it, they did.  Written by my dad, click here to read the answers to the thirteen biggest myths concerning having a large family, and leave your comments and thoughts at the end!

Do you agree?  Do you disagree?

Mrs H

tweet us @_mrs_h for chewy nuggets
Pin us at Pinterest for pretty photos and intriguing articles
Follow us on Facebook for recipes, giveaways, and brilliant flashes of perspiration!

Thursday, May 16, 2013

Ricotta Salata and Making a Cheese Press

Thanks for reading this post, I'm so excited to visit with you!  
After you've gleaned all the good information you need, visit our new blog platform at www.farmandhearth.com to read even more fascinating tidbits from the kitchen and the fields. 

Dear cheeseheads,

It's summer time!


Time for long bike rides, hot afternoons on the beach, and fly swatters.

Visiting the farm on a warm afternoon, we recently enjoyed a light snack of homemade crackers, fresh ricotta salata, and lemonade.

Ricotta Salata
To make fresh ricotta salata, you will need a cheese press.  If you don't have one, a very handy one can be fashioned from tools you may already have in your kitchen.

To learn how I make ricotta cheese, click here (external link).  

This cheese press works excellently with ricotta cheese and farmer's cheese, also called farmhouse cheese or cottage cheese. 


Ricotta Salata
You can eat this plain, or slice it onto crackers or sandwiches or serve with cut pears.  It makes a beautiful appetizer!  If you use much more than two cups of cheese in this small press, your block will be a little loose in the middle and not quite as uniform.  It still works quite well - I often pour in much more farmer's cheese than I should and get large, misshapen blocks because sometimes I don't care - but two cups is the perfect amount for a compact piece of cheese.  

1 pound (about 2 cups) fresh ricotta
4 teaspoons salt

Remove the top and bottom of a 28-ounce metal can.  Carefully wash all three components - the edges will be sharp.  You can file them down if you like; I just treat them cautiously, like knives.  

Set the can on an inverted bowl or elevated plate, set inside a pan or bowl to catch whey which will spill out.  Place the metal bottom inside the can.  If your cheese is very soft and liquidy, you can lay a piece of cheesecloth or muslin in the can; this is optional.  

Pour or scoop the cheese into the can.  Set the second lid on top, and weight it down with a heavy jar - a quart jar of water or peaches will do the trick.  Whey will begin to ooze out the bottom of the can - if you press down heavily on the weight, you may press cheese out, so be careful.  Set on the counter or in the refrigerator for about four hours, or refrigerate overnight.  

Remove the cheese from the can gently.  If you lined the can with cheesecloth or muslin, peel it back from the cheese carefully.  If you are pressing farmer's cheese, it will be finished now.  For ricotta salata, continue on: 

Using two teaspoons of salt, rub the outside of the cheese and wrap it in a thin cloth.  Refrigerate overnight or for two days.  Remove and again rub with two more teaspoons of salt, curing it for another day or two.  Repeat this step again if you like.  The finished cheese will be firm and well-salted on the outside - don't worry, it won't taste ridiculously salty.  The curing process seems to absorb the salt into the body of the cheese.  

Putting the loose ricotta in
Rosemary croccantini can be made with various toppings.  The crackers on the left are topped with traditional sea salt and rosemary.  The center cracker has a multi-seed topping.  The final cracker on the right is topped with crushed black pepper.

You can also get creative with the shape and size of the crackers!  I made these small, as they were to hold cheese samples.


Eating my curds and whey,

Mrs H
tweet us @_mrs_h for chewy nuggets
Pin us at Pinterest for pretty photos and intriguing articles
Follow us on Facebook for recipes, giveaways, and brilliant flashes of perspiration!

Wednesday, March 27, 2013

Silent

I apologize for the silence this week. Our family has been visited by grief as a sweet, precious member passed from this life. Our hearts are bleeding for the mourning parents above all, and for all of us as we stand by aching to offer comfort; thank you for the thoughts and prayers offered.


Tuesday, March 12, 2013

Deviled Meat Spread: My childhood, grown up and cooler

Thanks for reading this post, I'm so excited to visit with you!  
After you've gleaned all the good information you need, visit our new blog platform at www.farmandhearth.com to read even more fascinating tidbits from the kitchen and the fields. 

Dear angels,

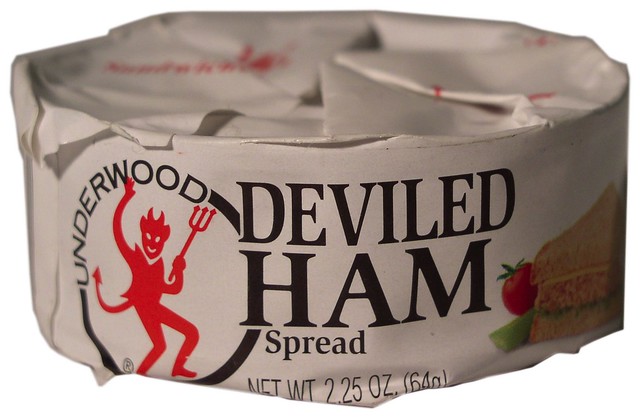
Not gonna lie, I love deviled ham.


We enjoyed it in sandwiches when I was a child, and it wasn't until last year when we were living in San Diego that I remembered how good it was, sought out a can, and enjoyed it wickedly on a slice of homemade sourdough.

But what ingredients are in the canned ham?  Well, sugar for one, and sodium nitrites for another.  Both of these are ingredients I seek to avoid - so I was excited when I accidentally stumbled across a recipe in my super-useful old Vitamix book for deviled ham!


You can vary the seasonings as you desire - or use chicken or beef for a shredded meat sandwich!  If I could only tell you how good this spread is!  You wouldn't be here long enough to finish reading my blog post.  Away to the kitchen!!


Choose your ingredients!


Scoop and dump seasonings and spreads into the bin of the Vitamix ...


Add cubed, cooked meat.


Chop coarsely!


Deviled Meat Spread
If you're vegetarian, replace the meat with cooked chickpeas! 

1/4 cup mayonnaise (homemade is most delicious!)
1 tablespoon mustard (I used homemade ginger-garlic mustard)
1 teaspoon paprika - hot, spanish smoked, or sweet
1 teaspoon onion powder or 1 tablespoon minced onion
2 tablespoons pickle juice
1 tablespoon relish (optional)
Sliced pickles for topping (optional)
1-1/2 cups boiled, roasted or otherwise cooked leftover ham, chicken, beef or pork*, cut into 1" cubes

*Any meat, really.  I mean this is basically tuna salad, with other meat.

Add ingredients to Vitamix in the order listed.  Pulse at 10 several times, or for just one second on high, until coarsely shredded or chopped.  Do Not overmix - if there are just one or two chunks left, let them be - you can easily overmix, and then you'll have a meat puree.  Remember, on high the Vitamix blades hit the meat 1600 times per second, so it doesn't take long!! 

Spread on sandwiches or roll in lettuce; serve with pickles for a spunky treat! 


Floating away on a cloud of deviled ham,


Mrs H
tweet us @_mrs_h for chewy nuggets
Pin us at Pinterest for pretty photos and intriguing articles
Follow us on Facebook for recipes, giveaways, and brilliant flashes of perspiration!

Friday, March 8, 2013

Homemade Deodorant That Works Better Than Dove Prescription Strength (made in one easy step)

Thanks for reading this post, I'm so excited to visit with you!  
After you've gleaned all the good information you need, visit our new blog platform at www.farmandhearth.com to read even more fascinating tidbits from the kitchen and the fields. 

Dear hard-working (and thus sweaty),

I consider myself an expert on store-bought deodorants.

As in, I've tried them all.

I HATE sweaty arm-pits - for some reason, it just irks the heck out of me when my arms feel sticky and soggy!  Perhaps the rest of the world loves it, but I loathe it!

I thought I must just be super sweaty or something, because even the Dove Prescription Strength stuff wasn't doing the trick for me.  Never thought about the fact that maybe store-bought deodorant, like store-bought cookies, milk and many (but not all) other conventional products, was just inferior to homemade, mystery-ingredient-less pit stopper.

Well, perhaps I considered it, but then remembered that homemade deodorant is hard to make.  Not sure where I got that assumption, but pretty sure I believed it, because I mean, who makes deodorant, really?

I was inspired to make it by this post.  This stuff was about as hard to make as a peanut butter sandwich.  Warning: if you can't even make a peanut butter sandwich, you may not want to try this, in fact you may not want to try much of anything.  

My ultra-fancy tools (hard to find but well worth it).  Bowls, spoons, mixer or whisk, and an empty or almost-empty deodorant container and spatula.


The mysterious and esoteric ingredients, available from anywhere things are sold.  Coconut oil, baking soda, cornstarch, and a scent if you like.


Literally it was just a few ingredients from my kitchen (three, to be exact, with one optional add-in), blended together.  Done.

I warmed the coconut oil a little to make blending easier.

  
Then I easily blended in the baking soda and cornstarch, as well as a few drops of essential oil just for fun.  


Smoosh, smoosh!  I chilled it in the freezer for about two minutes because I am impatient, and smashed it all thickly together.


Look, empty deodorant container!  I just took out the last scrap of deodorant.  If you're worried about the homemade stuff melting through, you could leave a little store deodorant in the container as a plug.


I slobbed some of the homemade stuff into the deodorant container because I'm fancy like that, and put the rest in a jar for refills later. 


Wiped it down and put on labels to be snazzy (a good time for chalk labels?  I'd better order more).


Homemade Pit Stopper Better Than the Store Bought Stuff and Also Less Mysterious
I wasn't sure I trusted homemade deodorant yet, so when I mixed this batch up I made sure I had a little bit of the Real Stuff set aside.  The next day I threw the Real Stuff away and now just use the Good Stuff! This may be difficult to make on a hot day, as coconut becomes liquid at warm temperatures. 

You can buy empty deodorant containers online!  Here is an affiliate link: 5 Deodorant Empty Containers - for lotion bar, heel balm etc. (2 oz.)


1/4 cup (generously scooped) coconut oil, warmed to partially liquid
1/4 cup baking soda
1/4 cup arrowroot or corn starch
Optional: essential oil or pure extract for aroma, unless you used virgin coconut oil in which case it will smell like coconut, yum!

Using a blender or a vigorous fork, whip together ingredients.  Store in a jar and apply by hand, or cool until thick and pack into an empty deodorant container.

Note: If you are anxious try try it, you can make some now and then let it soften and pack it into an old deodorant container later!  When I was packing it in to the deodorant container, I chilled it in the freezer for just a few minutes and then stirred it together to get it evenly thick.  Also, if you keep your bathroom really hot, you should be warned that this will melt right out of your deodorant container unless you leave a little store deodorant in the container as a plug.


Using It: The Facts. When you initially swipe this on, your body heat will instantly melt the coconut oil and your arms will feel wet.  When this happened, I was horrified!  I hate spray-on or gel-like deodorants that feel wet.  Hate them!!  Even though I know you can leave your shirt off and let the deodorant dry, it never really does and I feel sticky and irritated all day.

However, in this instance I was pleasantly surprised to find that the deodorant dried instantly, by the time I could pull a shirt out of the drawer; and then miracle of miracles, I forgot I was wearing it all day!  I even wore two t-shirts and a sweatshirt and then ran eight errands (with a baby!), which generally would leave me sticky and damp under the arms.  When I got home that night I suddenly remembered I was testing homemade deodorant, and hurriedly took off my sweatshirt to see how soggy I was.  What?  No sticky?  No sweaty?  A miracle!!  I raced off to throw away my store-bought deodorant immediately!!

Did I mention that even with premium coconut oil, this is still cheaper than buying deodorant at the store, even with store coupons... ?

You can even store spare deodorant in the freezer now - what a fun way to freak your friends out!

Not sticky,

Mrs H
tweet us @_mrs_h for chewy nuggets
Pin us at Pinterest for pretty photos and intriguing articles
Follow us on Facebook for recipes, giveaways, and brilliant flashes of perspiration!

ShareThis

LinkWithin

Related Posts with Thumbnails